Here's how my fingers fit inside the hands. It doesn't look at all comfy but it feels just fine when they're inside the gloves.
The stance, as well as modeling the mesh suit. It breathes and fits well. I'll be leaning forward like this for pictures/playing around, but walking around straight up due to the strain this puts on someone's back.
Close to being finished! I staystitched them three times total, I don't want any seams popping out entirely.
However, the hands constantly would fall down and slide off so I decided to put some elastic in the wrists. I just pinned it tight around my wrist, then sewed it into the actual glove.
Sewn.
Slightly loose, but that's all right.
My work area. The floor of our bedroom. I've got the reference pictures, computer to have the ones unprinted as well as tutorials and videos up, scissors, marker, foam, everything.
We got these Crocs at Dick's Sporting Goods for about $30. Kind of expensive but they've actually got some pretty durable bottoms so I'm all right with that.
My super nice Friskars Spring-Handled scissors! Not overly pricy but golly, they're just so nice for doing so much cutting.
Pictures of the feet as well as the gridding that was done on them.
I started out by cutting out some three inch x three inch x three inch blocks of foam, and cutting those down to look more rounded and toe like.
(note; none of the reference pictures you see are done by me!) We did crop out the rest of the dino and got this very good picture of just the leg.
I then measured the edges and then put the same measurements onto the foam and cut it out to put along the sides to make it wider.
Progress. I ended up removing the pieces from the back because I didn't like them, though. Made it look really weird.
Other foot.
Then the two completed feet! I took a quick video walking around in them so I could see how it moved and looked, and I think it looks pretty good. The tops have been trimmed more and the sides added to.
I've been kind of slacking on working on the costume due to needing help from my mum and not generally having the help around, as she's been busy lately. So I've been doing the things I can do on my own! First thing I've worked on, the plastic mesh head to secure the raptor head on top of my own. I used Matrice's tutorial for it, and found it quite simple. Only issues with it were that I had to have help make sure it was tight enough while holding the strips together, then to help mark it so I knew where to cut. For this, I used a very big, plastic needle with a huge hole used for needlepoint (on needlepoint mesh, who would have guessed, right?) and sewed through the holes just as if it were normal. It worked well, very strong and secure fit. We'll see how it works on the final product as far as staying on, but for now it seems very secure and I'm sure it will be more so once with an elastic jaw.
I made the strips two inches wide, which seems to have worked well.
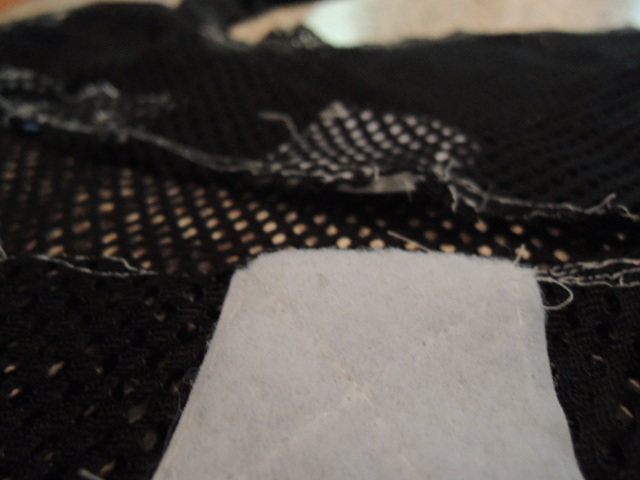
This is the athletic mesh bodysuit, which we purchased the fabric from Seattle Fabrics. We ordered two yards, which was not enough for myself as a 5'3, 100 lb. girl. The arms fell off the sides of the fabric and that was all right, we used scraps however one of them we plan to replace as it came out pretty messy. I recommend saving yourself the trouble instead of working with scraps, just go ahead and order enough. We'll need more for more than just repairing the arm so it's all right, as we need more anyway.
Originally we were going to use a zipper to get in and out of the front, however we decided to use velcro as it felt like it would be more trustworthy and less likely to fail or break or fall apart. The sewing machine HATED the velcro, so after two of them I went to hand sewing it. It's not the adhesive kind, we didn't think it would be enough for it to hold.
I basted the entire thing (loose stitches) several times to modify certain places however I also staystitched it three times. Fursuit makers, costumers who create fur-costumes made to look like animals (sometimes anthropomorphic) often charge pretty hefty prices to staystitch it more than once which I felt was unreasonable, however I can definitely see why after doing it myself three times. I'm working on a fabric with many holes in it, meaning the sewing machine doesn't grasp it very well, so I assume it's also difficult to sew fur as well, if not harder than a mesh fabric like this. Good side of that though is that it breathes well, and that when basting it didn't matter if I made a gazillion holes in it that I didn't like. This suit will be used to glue on the foam, and generally used to help put the costume on.
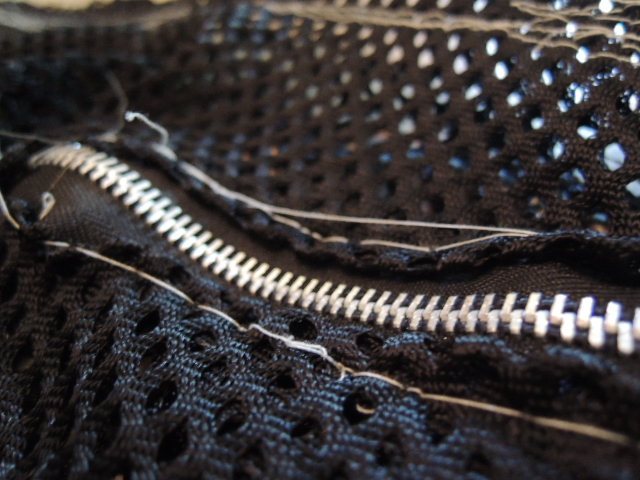
On the back of the ankles, we've installed a zipper on each ankle. The ankles were very loose when we made it, as my heels would not force through the open holes in the bottom. I didn't like the looseness, I wanted the suit to fit very well so that the foam would stay on firmly so we decided to put little 7 inch zippers along the backs of my ankles to keep it tighter while I could still get my feet in. Shouldn't be too hard to cover with foam, either.
The elastic...ugh. This elastic is eight inches wide, one yard of it, which I thought would be way more than enough but I'm quite petite even and it's just barely enough. This is to attach to the tail, and keep it held up. The velcro I have begun attaching and I'm telling you, it's a pain. The entire thing is very thick and hard to pierce through with a hand sewing needle and has pretty much rubbed my fingers raw. I haven't taken any pictures but we couldn't find any velcro sheets, so I've cut it into eight inch strips, six of them, to attach and will take pictures when we've got that going.
This is the current "outline" I have for this project. It isn't overly detailed, but it will give you an idea of what I will be trying to cover here. This isn't necessarily complete, but it does help! There's a lot to do and I'm still in stage one, getting ready to begin the second. Very exciting stuff, here. :D
STAGE ONE:
Buying materials.
- Duct Tape Dummy.
- List what materials to buy and the places in which I bought them.
- Choosing materials for the project.
- The money spent to buy all the necessary materials and how much of what.
- Sew the mesh beginning body suit and try it on.
STAGE TWO:
Carving the basic foam body to get the general shape.
Pictures of the foam before I started, maybe a video of how I’m carving it, how I’m putting it together, showing how to repair it if a mistake is made. This is a very big step.
Tail: Pool noodle. Carve it so that it is very long and nice, use a strong elastic to keep it around the body properly.
STAGE THREE:
Carving the details, including teeth, gums, tongue, nose, scale detailing, claws and the eye outline. Reference pictures as well. Put the eyes on before I put the fabric as well as any other details.
STAGE FOUR:
Putting all the foam together to form the dinosaur onto the bodysuit.
STAGE FIVE:
Covering the dinosaur in fabric, showing how I sewed it together, how I glued it, how it all fit together. Showing how I now have a dinosaur costume base.
STAGE SIX:
Painting the dinosaur.
STAGE SEVEN:
Try on the costume to make sure everything looks right. Finish the closer up painting such as the teeth or cover in fabric if we decide that’s the better option. Fix anything that doesn’t look “right.”
Earlier this year we had just gotten home from MegaCon 2013, a very large anime/sci-fi/comic/general nerd convention in Orlando, Florida. It was our second time going and we went all out--hotel, all three days, planned schedule and everything. We had an absolute, amazing blast during it all and seeing all the others there dress up in costumes and cosplay made me want to join in as well. Upon returning home, despite having a whole year until the next MegaCon, I felt the need to think a lot about what sorts of costumes I could do. I thought of specific characters from things I read or watched or generally enjoyed, but none of it just seemed to have the wow factor I wanted to obtain from dressing up.
I sat down one evening toward the end of March with my old dinosaur of a Windows computer, booting up the Microsoft Zoo Tycoon 2 game and I waited. When I found myself scrolling through the available animals of all different species, I stumbled upon one of my past favorites from the Extinct Animal Pack add-on. The velociraptor. Going down into zoo guest mode allowed me to get right up close with the virtual recreation of the dino--despite popular belief, including myself prior to purchasing the game several years before, velociraptors were only around three feet tall and six feet long. Much different than the villainous deinonychus, which is the larger dinosaur that was portrayed in the ever popular Jurassic Park movie series before the deinonychus was discovered.
With the two things in my mind colliding, velociraptors and costumes, I quickly thought to myself, How cool would that be as a costume? A dinosaur. My next thought was this: how the heck would I be able to budget for something like that? A realistic dinosaur costume sounded expensive, and even though I did have a good bit of money saved up, it still didn't seem possible. But even as myself, big dreamer and ever hopeful for my own success, I finished up playing in my zoo, watching the velociraptors and their virtual mannerisms. Directly thereafter, I headed off to the internet, mostly YouTube, and began my research to see if I could find much at all relating to velociraptor costumes for smaller budgets.
The first costume I stumbled upon was the most popular of the lower-budget dinosaur costumes. Made by a creator who goes by Monoyasha, in her costuming business of Dream Vision Creations, it was also the one that made me realize that it was possible to make a realistic dinosaur costume without spending the money on latex to mold into a reptilian skin. You can find her accounts & all credit to her costume goes to her. She mainly works in the fursuit & furry fandom, but did this as a mascot costume and charged a pretty fair bit for it (she said it was the price of a quadsuit, which is a costume that walks on all fours which goes for $3,000+ I would say).
Here you can see the first video of a velociraptor costume I found. If you check out her YouTube channel, she has several other videos of it that she uploaded fairly recently too. Do keep a few things in mind while viewing her video, as I know she gets harassed constantly and I've tried my best to be most polite with her while asking her the questions I've had (and she's been most helpful with them as she can!).
- She modeled her velociraptor costume after the ones from Jurassic Park, which is a non-feathered dinosaur before paleontologists discovered the fossil bones with feather tips built in, just as the commissioner requested.
- The commissioner also requested for more bulky ankles, which Monoyasha gladly provided for her. She is also wearing a costume slightly small for her for the video, as this was uploaded by Monoyasha herself.
- The costume was entered in DragonCon's Masquerade contest a few years ago, I believe in 2011, and won first place.
It's very impressive for what it is. This is the one that got me excited about it, as she mainly charged so much for the time it took to create it rather than the materials used.
I had many other influences from others, but these are the main two. You can easily do your own research, if a dinosaur costume in general is one you'd like to attempt. Velociraptors are a bit more popular than other dinos, one day I'd like to try another one when I'm much older. If this one is fun and goes all to plan of course, too.
This costume has a lot of planning that has currently gone into it, and much more will continue to.