Saturday, October 26, 2013

Raptor Legs. And kneecaps are annoying.

 So after the thighs were done, I kept working on the calves/ankles. I'm very proud of how the legs look from the side, still unsure about the future for the front of them. Haha. Very easy process to snip snip snip away and it's probably my favorite, way more enjoyable than the math and measuring.
 As you can see, I have a little piece at the bottom that runs along the side of the foot. I removed that as it was a hassle when walking.
 I'm still quite proud of them.
 Using the Foam Fast 74, I attached the legs to the dummy and then tried it on a while later. Gluing was easy, the stuff isn't as messy as I thought it would be. 
 Back of the leg. The back around the thighs won't be padded, at least not yet, as that's where the tail will go and we're going to try and make it fit around the tail as best as we can. Currently my goal is to be at the head-making by mid November. 
 Current front of the thighs...the one on the right isn't as carved down as the one on the left in this image. Not sure how much I like it honestly, haha. :b I think it'll look a lot better when I see fabric on it...but I dunno. We'll see.
 Obnoxious selfie with the dummy in the background. Didn't have anyone to take a picture for it. I think it's coming along well, keep in mind the kneecap is supposed to stick out further than the thighs so it will be more "bent" looking. But honestly? The kneecaps are giving me hell.
 Again, not sure how much I like the way it looks yet. Gonna have to see it with kneecaps and toes before I can really determine precisely what the thighs need.
 Okay, so lemme just say I have made many kneecaps that I have yet to be happy with. Circular ones from 2 inch foam were good for walking but they didn't look right. Made an oval pair and it looked terrible from the side. Tried laying up two together and it didn't look like knees. Not where where I'm going yet with that but I do know the legs are super-duper padded and are going to be the hottest part of the costume. Just gotta be glad I'm not putting any foam inside the legs...
 My foaming around the ankle zippers. The spandex will be put specifically around it so the zipper will not be seen from the back. Also keep in mind there will be a dewclaw back here toward the inside but I think I'll work on that when I have the front of the leg done and have the claws here (which, by the way are on the way! All of them ordered from Dreamvision Creations except for the raptor "hook" claw which I will be casting on my own since I want a different look than what they offer).
 More kneecaps I was not happy with. The Foam Fast 74 is pretty great. With the Super 77 it left this weird crusty feeling between the foam that was really difficult to cut through. The 74? Nada. It's like it's one solid piece of foam. It's dreamy.
Once again, more kneecaps I'm not happy with. I've experimented a lot so far but it looks like I've got more to go. Currently I've got this planned:

- Finish kneecaps. Front toes. Back dewclaw.
- Redo the toes on the shoes. Not happy with how they look and I think I've got a better method of doing them.
- Redo the fingers. I want a more muscular look to them. 
- Start carving the head from the rigid foam, then use the clay to sculpt over it and yadda yadda yadda. That's when I'll get into some more detailed tutorials. Right now it's just kind of boring foaming that's easy to figure out, haha. :b

Wednesday, October 16, 2013

Gridding, Raptor Thighs & Chosen Fabric

 Haven't updated lately because I waited for Foam Fast 74 to come in, which is supposed to work WAY better than Super 77. Super 77 hardly works at all and I'm sure Foam Fast will work much better than it. Although not one store in my entire county had even heard of it, hardware, craft, upholstery, nobody even knew what it was. I ordered from Zoro Tools on eBay for $16 and it shipped the same day, arrived 3 days later. Totally recommend them.
 For the patterning we used the above image and made a grid on acetate to transfer it over. The legs need to be symmetric and this was the best way about going around it. The math is aggravating but very much worth it in the end. 
 I believe the grids for the thighs are 2.5 inches, but I might be remembering wrong. It was a bit tedious and we ended up coloring the sheet so we could keep up with the layering. The kneecap will be added last and I will not be offering these patterns for others to use, at least not right now, sorry about that.
 All different pieces of paper. We used this brown paper my dad uses to wrap fish that we get from Office Depot, anything that's big enough will work though but we have a ton of this stuff so it works well.
 All cut out and layered up!
 While I was working on the thighs my fabric sample came in! It's from Spandex World, the one on the left as the other one is the cotton lycra in dark brown. I much like this sample and intend to use it--a nylon-spandex mixture it's a rich, chocolate brown that feels like it will breathe very well and take paint well. It's matte milliskin. 
 Carved down. Probably took me about an hour to get this far, I'll probably smooth it down more depending on how it looks with the spandex skin. I may end up liking the sort of uneven texture but I may not.
 Good look at the fibers. It feels very smooth and stretches very well.
It has such a nice color to it. Anyway, I haven't done all that much lately but today or tomorrow I'll do the patterning for the calves and maybe even the ankles. I plan to redo the toes and probably the fingers too because I'm not sure if I'm happy with how they look, but that'll be fairly simple. It's coming along so well! I'll be going to Home Depot soon to get stuff for the head.

Monday, September 9, 2013

Tail, fabric, feather test and zipper!

 Better look at how I'm holding the tail up. Another strap or two will be added to the crotch, but for now this holds it pretty darn well. 
 The best thing if you do this is when you sew the nylon webbing around to fit, make SURE you push it up as absolutely far as you can make it go. I thought I had mine pushed up, but that purple dot is just how much further it went up when put on which resulted in quite a bit of sewing to fix it (the beltloops had to be made shorter, shorter and shorter...)
 I ordered some fabric samples from SpandexWorld, the brown is cotton lycra and the pink was for the mouthflaps and it's a milliskin type fabric. 
 The pink is in the coral color, the piece is so tiny it's nowhere near enough to use for the mouthflaps unfortunately. I could *maybe* get one out of it. Not sure what I plan to do about that, but it's a last decorative bit of the costume anyhow I suppose. It's perfect for what I need, just not enough of it.
 The brown feels like it would work perfectly but the color in real life looks like a blackish green depending on the lighting. In this shot it showed up more brown though, but it just isn't the right shade. Spandexworld has a "dark nude" color that's much too light so I guess I might get a sample of that and the white, and maybe try dying it. I don't know what I'll do about fabric now. It's nice and thin and breathable, feels like it will take paint well but I just don't know about it.
 It looks much different than it feels, though, oddly enough.
 Feather test! I sewed it onto the old sample from Johann's though, by the way. It's just a random one I had around here. It seems like it'll hold well, if you tug straight on it then it'll pull right out though. It holds well when I shake it around, doesn't slide but I don't know about it. I'd rather sew than glue but this is the best way to go about sewing it and it still moves--it might hold better to just bucker down and buy up all the E6000.
 I changed my mind about the Velcro and decided to input a zipper, and we did so over the weekend. Way prefer it and I don't recommend velcro for a suit unless it's to cover up the said zipper. It holds the costume better, is slightly roomier and is just generally preferred. Seriously.
You can also sort of see where I pulled the torso foam off. We've decided that the legs need to go before the torso and that's what I'm doing next, although it'll be very hard. :x

Tuesday, August 27, 2013

Tail & Hand Progress


 A nice picture of my attempt at a neat pile of foam. Not so good. Since this though, I assure you I have used up quite a bit of it (although we still have plenty left!). I have not taken pictures of the torso, I have worked on it however I'm not sure where I'm taking it from here. 
 The first tail, which was trashed, heads up. We took the pool noodle, wrapped the foam around it, glued it with Super 77 then used duct tape to hold it down however this idea was trashed due to the lack of swing to it, and overall it didn't hold well.
 It looks pretty rubbish, so we pulled all the foam off of it and put the pool noodle aside to just use the upholstery foam.
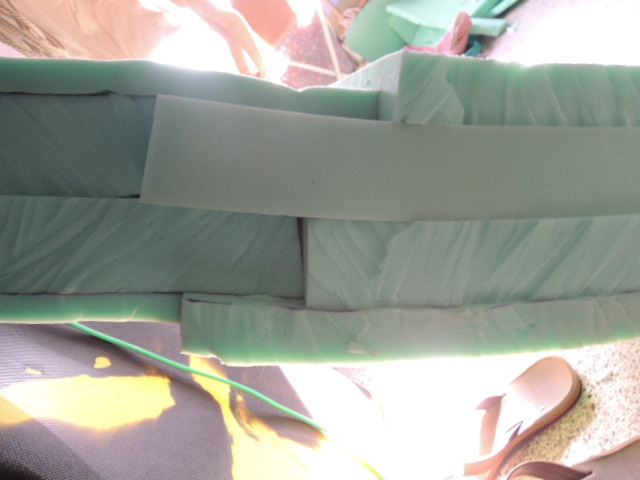
 Here's where the tail began. Two blocks of three inch foam, two blocks of two inch foam. Staggered together, mind you.
 Lotsa foam.
 We did the same staggering method throughout the entire tail, just doing it like bricks. The last little end of the tail is just a scrap of two inch (maybe three?) I had around, and it worked perfectly! Wiggles just like I want it to.
 Brick laying.
 It got a bit more difficult and complex as we went on but I figured it out, luckily. While working on this entire thing I've watched three out of four seasons of Kim Possible. So I say definitely take advantage if you can do this in front of a TV or have a laptop.
 The not-so fun part. We used math to make the tail as symmetric as possible.
 We used a ruler to put a straight line to make it easier for us.
 Then we did some math, figuring out how wide it needed to be at certain points and drew the lines for me to work from.
 Pretty good way along. Also keep in mind, we intended for one side to be the top but a different one ended up being the top with a few minor fixes.
 More progress. By this point I have about 40/58 hours in. Yes, this tail took about 58 hours in all to get where it is at the end. That's how I have watched so much TV while working on this darn thing.
 I also recommend a buddy to keep you sane while working on such a huge project like this.
 I did my best to make it smooth however I'm not stressing, as we're thinking about doing a "scale effect" to it (more on that when it comes time) and if we don't do that, I don't think it will really show through the fabric. We ran into a few things regarding how to attach the tail to the body however I think we figured it out. When we get to more specific stuff like that, I will be writing up actual tutorials for such a project.
 I got some pretty terrible blisters on my hands from the scissors, despite being spring-handled and extra cushy. So one day I used a glove and it still didn't help all that much. So, I wore the other glove on top of it and it was perfect.
 The tail all smoothed out, however not quite done.
 I've been keeping up the foam scraps to contain the mess, my mum thinks we might use them to stuff a dog bed or something, haha. Surely we can reuse them for something.
 Going right through the foam still.
 One thing we tried was to glue (E6000) to the waist elastic. However, it held for about ten minutes before it completely fell off so I don't recommend gluing the tail to anything to hold it up. We'll be relying on sewing, hopefully if it all goes to plan.
 The more finished tail! The end part I think looks all right but I may fix it up. You can see on Monoyasha's raptor ( http://monoyasha.deviantart.com/art/Velociraptor-Fullsuit-1-254975766 ) as well as most raptor drawings ( http://fc08.deviantart.net/fs71/i/2011/065/2/7/velociraptor_sornaensis_female_by_beastisign-d3b36u6.png ) how it comes down and under the crotch--this will also be used to hold the tail up, again which I'll go over when we get there.
 I also started on the hands! This is the bottom of them, with the finger extensions (kept extra long for now until I decide how I want the claws to be)
 For good hold and extra nimble fingers, the foam is cut slightly and slid over the fabric.
 On the top, there are some pieces to raise it.
Then this piece which I just cut out to the same shape for each hand. Still a lot of work to go but they're a start. I also made a quick clip before the tail was done, showing the brick-laying method. http://www.youtube.com/watch?v=E8HvykGhzzc